Showing posts with label non-sewing. Show all posts

Hey look! It's another Woodcraft post not written by Wood. . .

I know you probably come here because this is the last place on the site where you can escape my constant drivel. But she's been incredibly busy with work lately, trying to catch up after we were on vacation and making up for the fact that I was out of town last weekend.

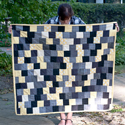
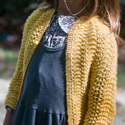
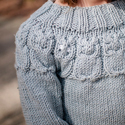
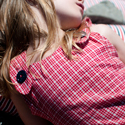
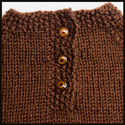
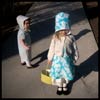
About a year ago she started knitting seriously. In addition to that first sweater, she's knitted the girl a beautiful dress, a pair of felted slippers, two pairs of mittens, a pair of gloves, a sweater vest for the boy, and a blanket that's still not quite finished. I wish she'd be better about documenting the process and results of her efforts, and frequently complain that she's being too modest. So today I wanted to share the beautiful back-to-school sweater she knitted with yarn that the kid picked out at the Stonehedge Fiber Mill (she chose the buttons as well):


The girl has worn this every day since it was completed.


I asked Wood to send me an email about the sweater, reminding her that she while she claims she doesn't have time for a post, she probably sends about 100 emails a day, so I was pretty sure she could find the time to write me one about the sweater. Here's what she wrote:

I knew that I wanted to knit Juniper a sweater, and I knew that a cardigan would be best for her because she constantly fights with me in the mornings before school about wearing enough layers. A cardigan is so low commitment -- easy for her to take off if she gets hot -- so she is more willing to wear them. 


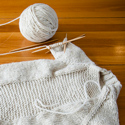
Her new favorite color is orange, and she picked out this beautiful yarn herself. It's called antique rose, but it isn't pink so much as it is coral. Up close you can see that orange and pink strands were spun together. I could not possibly love this pattern more. It's the small version of the Tea Leaves cardigan, and the directions are easy to follow, it is fun to knit, and it comes together beautifully. I think I'll be making more of these. 


I started knitting this sweater while we were at Squam Lake, and spent most of our afternoons and evenings by the fire working on it. Even though it's only been three weeks since we got home from our trip, it already seems like it was years ago. The combination of being very busy at work and the kids going to school (and the crazed, very early mornings that come with it) makes it feel like our relaxed lives at the Rockywold-Deephaven Camp were in a different life. My days are desperately missing the calm that I felt there, but every time I look at this sweater I remember working on it in front of the fire with Gram in my lap or at the lake while Juniper learned to knit next to me, and tell myself to relax just a little bit. Everything is going to be okay.


I am really going to make an effort to get Wood to share more of her projects. She is getting together with a group of women here in Detroit who all want to learn to knit, and because she's only been at it a year she'd love to have an online community of folks knitting with them. Any readers out there want to learn to knit? Leave a comment with an e-mail and we'll get a ravelry group together.

Felted Slippers

Posted by Wood | Friday, March 26, 2010 | , , , , | 0 comments »

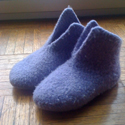
My daughter has been asking for slippers all winter. Around Christmas, I saw that many places were selling "boiled wool" slippers, and I thought, hey, that's just felted yarn! Why buy slippers for $19.99 when I can spend sixteen hours knitting them?I had to explain it all several times to my confused husband: yes, first you knit slippers and then you wash them in hot water to make them look like they weren't knitted. Duh.

Of course, Christmas came and went, and I still hadn't made slippers. Then my dad and stepmom bought Juniper a child's sized pink snuggie for her birthday, and it came with a pair of pink fleece socks. The socks, which she lovingly called slippers, were as cherished as the monstrous pink blanket with armholes that she started sleeping with with instead of the quilt I made her. The poor girl was really desperate for slippers and I wasn't about to concede victory to that smiley white guy on the couch who really needs to stop raising the roof while wearing a cheap fleece blanket with arm holes.

I took her to the yarn store and let her pick out whatever yarn she wanted. She choose purple, and last month, I finally started making them. I followed this pattern, which instructs you to knit a long strip, about 4 inches wide and two feet long, with two extra squares on each side near the bottom and top. Then you fold the strip up and sew the edges together, and it takes the form of a giant, pointy shoe. Then you throw the slippers in a hot wash (I used my front loading machine), and voila! the giant crazy pointy shoes turn into darling slippers.

I followed the instructions for the child's size. They are perfect -- maybe a little big, but they will definitely fit next winter. Best of all: it turns out she she likes them even more than the snuggie socks.


My wife is really busy at work lately so I'm doing the craft post this week.

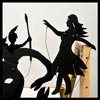
We fell in love with Owly Shadow Puppets when we met Andrea at the Detroit Urban Craft Fair last winter, and we bought mermaid, fairy, and robot puppets. They're so beautiful we put them in the flower vase sometimes when we don't have any fresh flowers.

The kid and I wanted to try to make some for ourselves to tell the story of the Birth of Pegasus, her favorite story right now (Perseus cuts off Medusa's head, Pegasus leaps from Medusa's blood: kids are awesome). Our puppets were not nearly as nice as the Owly ones (Andrea uses a precision laser cutter for her designs) but they work. Owly posts a how-to on the site, and I'll also walk you through what we did:

We started with a huge piece of black cardboard that we bought at the local art store (Utrecht). It's significantly thicker than ordinary poster board and can be a bit pricey (I've seen it anywhere from $6-$9 for a huge sheet). You definitely want the thick, expensive stuff. One sheet should be enough to make at least twenty puppets.

We also used the following:

*Pencil
*Strong scissors (in our case, kitchen shears). A box or x-acto knife is also useful for more precise cuts.
*hot glue gun
*wooden skewer
*2-3 feet of thin wire
*nail scissors, or anything really sharp and pointy (and small)
*handful of brass fasteners (brads)
*a couple clamps (optional)

We started by making a sketch of the desired puppet on the cardboard. Remember that the side with the pencil marks will be the rear of the puppet, so sketch it facing the opposite of the way you want it be in the puppet show.

When I pulled the camera out for this tutorial, we had already made Pegasus, Perseus, Medusa, and Athena, but the kid really wanted to make a puppet of Urania, the muse of Astronomy, who apparently took care of Pegasus when he was little or something (she saw this in a video my wife bought her at CVS). She's memorized the story which is narrated by Urania. To hear your 4-year-old daughter correctly pronouncing the words Terpsichore, Polyhymnia, and Melpomene? Classicist cockles: warmed.

Urania is just a chick in a Greek dress; I sketched her like this:

In retrospect, she's a bit busty and shortlegged, but I like to sketch it a little bigger so I can trim the edges neatly if I need to. The kid drew Urania for me on her easel while I was doing this "so I would know what she looks like." I made her without arms because I knew we'd attach moveable arms later. Then I cut her out.

We wanted her to have some motion for the puppet show, and the kid wanted her to be able to dance. I gave the arms nice wide shoulders to accommodate the brad (the shoulders would be hidden behind her). I pierced the torso and the shoulders with nail scissors and fastened them to the back of the puppet:

Owly puppets have these wonderful cut outs that really enhance the whole shadow effect, but wasn't able to do cutouts neat enough with the x-acto or the scissors, so I just trimmed a bit along the hairline and the skirt to give the shadow a little more texture. After I was satisfied with the cutting, I attached the wooden skewer with hot glue and clamped it for a minute or so.

The last step is attaching the wire that will make the arms move. I punctured the hands with the nail scissors and twisted a length of wire in each, connecting both at the base of the skewer and twisting them into a ring to pull the arms up and down:

That's it. You're ready for the puppet show. We did this with the lousy camera in the MacBook, so apologies for the quality:


Nothing fancy, but a lot of fun. Next maybe we'll do Ulysses and the Cyclops or some pirates. Wood has made the kid three or four new dresses so I'm pretty sure there will be a new post about that any day now.


Previous Project