DIY Birthday Present: Fox Toy & Book
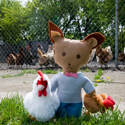
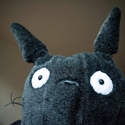
Posted by jdg | Thursday, July 22, 2010 | hand sewing, stuffed creature, total beginner project, toy | 0 comments »We are the annoying people who come to your kid's birthday party with homemade presents. It's okay for now I guess, but in a few years, when your kid wants Legos and we bring hand-sewn madras shorts or something, it's going to be really embarrassing for our own children. For our daughter's best friend's fourth birthday birthday a few weeks ago, my wife hand-sewed a stuffed fox (sort of along the lines of the stuffed mouse she made for another 4-year-old last winter). The kid in question loves reading and watching The Fantastic Mr. Fox with his mom, so a fox was an easy decision and I decided to make a book to go along with the animal. The kids and I spent a beautiful morning wandering around the city taking pictures of the stuffed fox in places the birthday boy would recognize. The basic story we made up was along the lines of book/movie, with a Detroit fox who gets cramped in his tiny house, so he sets out to find a new one. This house was too big:
He eventually decides that he wants to live at the birthday boy's house, but he finds out he needs to bring the boy some chickens before he can live there. So he tries to catch a "chicken":
But he's just not fast enough, so he drowns his sorrows in a glass of cider at Slow's Bar BBQ (a restaurant owned by the birthday boy's family; we actually ran into him while inside and narrowly averted disaster by hiding the fox behind my back).
The fox returns to his neighborhood and sees his friend (the fox my wife made for our daughter) and she tells him he's been trying to catch pheasants, not chickens (and that chickens are easy to catch).
He can even buy them at Honey Bee Market la Colmena:
But instead, he chooses to follow his fox instincts and steal some chickens from the urban farmers of North Corktown:
With two chickens in hand, he makes his way to his new home. The last page of the book showed him on the boy's porch, and we hid the stuffed fox right by the door before reading the book to him.
Once we were done shooting the photos, we uploaded them to Shutterfly and used their software to quickly turn them into a gift book (full disclosure: Shutterfly has advertised on Sweet Juniper before, though this post and production were not undertaken as part of any advertising campaign or sponsorship---we just like the product enough to keep using it).
After less than an hour of taking pictures, we were able to create a really personal book where the character went to really familiar places like the birthday boy's favorite playground and even his dad's office (his dad, a realtor, is the one who helps the fox figure out where he's going to live). We were able to include a picture of his dad in the book, as well as get a small image of the recipient himself in there via the pictures on his dad's desk:
It involved some planning (the books take about a week to get printed and shipped) but it really didn't take that much time to get it all done. And the birthday boy and his parents were really appreciative. Wood highly recommends Kata Golda's book Hand-Stitched Felt for making these easy stuffed creatures.
A birthday present for a four-year-old- No Sewing Machine Necessary!
Posted by Wood | Monday, February 08, 2010 | easy project, felt, hand sewing, stuffed creature, total beginner project | 0 comments » Knitting has helped tear me away from my sewing machine, and I love being able to make something without sequestering myself in our dark basement tied to my sewing machine for hours. I bought Kata Golda's Hand-Stitched Felt hoping to find quick, easy projects that I could make completely by hand, and I was not disappointed. Not only is wool felt lovely to touch and work with, but there is something incredibly satisfying and meditative about hand sewing. (I try to relax and enjoy the process when I'm machine sewing, but more often than not I work in a frenzy and emerge from the basement harried and covered with a million stray bits of thread and fabric.)
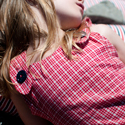
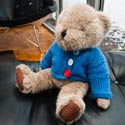
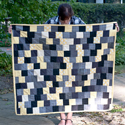
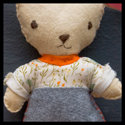
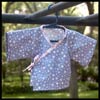
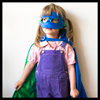
I made the little gal pictured above in one night after the kids were in bed. I only had one night to do it, because the next day was our niece's birthday party, but one night was plenty of time. The only modification I made to Kata's pattern was that I made the shirt out of fabric instead of felt to match a quilt I'd recently given to the birthday girl's baby sister.
I highly recommend this book if you're interested in getting into stuffed creatures but are a bit intimidated by a sewing machine, or if you just feel like taking a break from your machine. It could not be easier, and the end result is pretty adorable.
 (it might be hard to tell from the picture, but the doll is about 12 inches tall.)
Valentine's Day laptop sleeve
Posted by Wood | Friday, February 13, 2009 | easy project, for the laptop, no pattern, total beginner project | 6 comments »I needed a laptop sleeve to protect my McBook when I need to throw it in my bag; it's also nice to cover it with a little extra padding when it's just in the house, because, you know, there's a terminator in living with us. I didn't look for a pattern, and I wish I had planned a little more before I got started, but in the end it worked out okay.
I figured all I needed to make was a big padded envelope. I used two medium weight fabrics for the outside and the lining, and put some batting between them. I didn't use specific measurements, and instead just measured around the laptop.
 I started by figuring out where I wanted the velcro to go, and then sewed it to the lining (for the flap) and to the outside fabric (for the inside closure).
 Then I sewed the edges of the outside fabric and the lining together (without the batting) wrong side out. After turning it right side out, I placed the batting inside, folded the whole thing into an envelope shape with the lining on the outside, and sewed the edge together. Then I turned it right side out, and I was 80% done.
Unfortunately, I left finishing the top edge for last, and that's where it got kind of messy. I put a binding on it (like quilt binding), and I wasn't very precise in my measurements or cutting, so it's little bumpy and uneven.
 Here's the back side and some more pictures:


 Overall, it's a little sloppy. Anyone more experienced ever made something similar or have any ideas on how to be more precise? How would you have finished the top edge? The velcro closure is all right, but I could have used something stronger. Maybe a button and button-hole (or two)? I'll probably make another one when I fall hard for some new fabric.
Four years old today
Posted by Wood | Thursday, January 29, 2009 | birthday crown, total beginner project | 2 comments »
 I made her a birthday crown for her birthday. Jessica has a wonderful tutorial on making a felt crown, and that's where I started. I didn't follow it exactly, but I started with her instructions and just made up the rest as I went. I made the crown out of wool felt, ribbon, embroidery floss, fabric, elastic, and regular thread. I cut the flower free hand. I sewed the top edges together using a blanket stitch I learned from this tutorial.
Kimono Pajamas- A Beginner Pattern Project
Posted by Wood | Thursday, January 22, 2009 | kimono, oliver and s, pajamas, pattern, total beginner project | 2 comments »For years I sewed infrequently, occasionally making a purse for a friend or a little something for Juniper once in a blue moon. And what I made was pretty awful. I never used patterns. My finished projects were best viewed from at least 10 feet away, and that's just not a great feeling to have about something you spent so many hours creating.
I admit I was intimidated by patterns, and never even bothered looking through the hundreds of patterns available at the fabric store. I was sure I'd buy a pattern, spend a ton of time figuring it out and following it, and end up with a finished product that was ugly anyway.
Then, a few months ago I downloaded the free skirt pattern from Oliver + S, and the skirt I made ended up looking nice, but even better, Juniper actually loved wearing it. The instructions were really simple, and I never would have figured out how to do it on my own.
So then I took the plunge: I purchased a pajama pattern from Oliver + S. I let Juniper pick out her fabric, and bought the same fabric for Gram in a different color. [Note: my husband just reminded me that in the future, I should take pictures of my projects as I'm working so that readers can get a sense of the process and not just the finished project. I've read enough craft blogs to realize he's right, and after this project I will do so.]
I'm pretty proud of the finished result:

 In fact, I like the design of the pajamas so much that I kind of want a pair of them myself, and I normally can't stand pajamas. Jim thinks they make the kids look like samurai in training, which of course is awesome (to him).
Oliver + S gave the pajama pattern a difficulty rating of beginner, which "assumes familiarity with a sewing machine; understanding of how to sew a seam, thread the machine, etc." The pattern was not easy to complete, but I didn't spend a lot of time swearing and I didn't shed a single tear. It was a well-written pattern, and worth the $16 price tag. I'll probably make several more sets of these pajamas.
About the price -- I've decided that if I'm going to sew something, I want to make something prettier or nicer or better designed than what I can buy at the store. I'm not sewing for thrift, because I am sure I could buy all of the things I make for less than the materials and my labor time. Instead, I want to enjoy the process of creating and I want to be completely satisfied with the result.
An even easier beginner project
Posted by Wood | Wednesday, January 14, 2009 | easy project, lovey, security blanket, total beginner project | 0 comments » Gram has elevated one of his blankets above all the rest. When he finds it, he buries his face in it and sits still for a few seconds, and stillness is not ordinarily one of his virtues. We had the blanket custom made by Javis Davis, a great small company that has advertised on Sweet Juniper in the past, with a cool geometric pattern on one side, and this soft, almost furry, fabric on the other. It's this fabric (Javis Davis calls it "fluff turquoise") that Gram loves so much.
I guess this blanket is his security object. Juniper never really became attached to an object this, but Gram already has a visible response when he sees his blanket. The blanket is too big for him to carry around though, so I decided to create a smaller version out of a similar fabric for him to lug around wherever he wants.
I wasn't able to find an exact match for the turquoise fabric, but I found one that came close and even in the store he clearly liked to rub it against his cheeks. Of course, when she figured out what I was up to, Juniper wanted one too, and requested that it be "girly" and "flowery." These are the soft sides:

And here is the print I used for Gram's:
I added some ribbons for Gram to play with. The ribbons also make it easy to tie it onto a stroller or hook to his car seat straps. Juniper uses the ribbon loop on hers to carry it around on her wrist.
 I doubt that Gram will ever be attached to the little blanket the way he is to the real thing, but it was fun to make and I was really pleased with how it came out.
 Major fabric stores usually carry some fabric like this in the baby section. I found mine in my favorite specialty quilt shop. It's pricey -- I bought a quarter of a yard for $9.00. The one I used for Juniper is the same texture but has a purple checker pattern.
Once you have the fabric you want to use, cut a rectangle of your desired size from each fabric (I did about 9 inches wide and 18 inches long). Put the right sides together (wrong sides out), and stitch along 3 sides. On the fourth side, sew a few inches in, but leave the middle portion unsewn. Then turn the material right side out. If you want to add ribbon, this is where you do it. Place a length or a loop of ribbon inside the unsewn edge, and then tuck the edges in so that it matches the rest of the blanket. Sew along the fourth edge, making sure to seal the raw edges inside. Finally, stitch all the way around (all 4 sides) on the right side. I actually did this twice -- I sewed a 1/4 seam around once, and then sewed again inside that seam.

Easy beginner project: The Doll Quilt
Posted by Wood | Thursday, January 08, 2009 | doll quilt, quilting, total beginner project | 23 comments » Based on the response to the quilt I made from Juniper's baby clothes, a lot of you feel just like I did before I started: like you want to make a quilt or just get figure out how to use your sewing machine that hasn't done anything but gather dust in your basement for the last few years, but you're overwhelmed and not sure where to begin.
I have the perfect project for you: a doll quilt. Although Juniper's quilt was technically my first project, before I finished it, I made a doll quilt so that I could practice binding the layers together on something smaller. I loved how it came out, and so I made several more. I think it makes a great beginner project before tackling something bigger.
If you have a sewing machine and some thread, all you need to buy is a good rotary cutter or sharp scissors, a cutting mat, batting, and fabric that is so pretty that you let out a tiny squeal of delight when you first see it. I think it's worth it to spend money on fabric that you absolutely adore --- you only need small bits and scraps for the doll quilt, and the process is so much more fun if you're using fabric you love. Specialty quilt shops generally carry fabric by designers like Denyse Schmidt, Heather Ross, Amy Butler and Erin McMorris. I also recently found this etsy shop that carries tons of gorgeous prints. You can buy by the yard or in much smaller sizes, and for a doll quilt, you really don't need that much. (I got lucky and stumbled across a Crafty Planet booth at our local craft fair where they sold pre-cut one yard pieces by most of my favorite designers for $8.)
Lastly: you need a special foot for your sewing machine. I can't figure out the technical term for this is (please feel free to tell me in the comments, experienced quilters) -- but just throw yourself on the mercy of the lady working in your specialty quilt shop, and she'll show you what you need. You want a foot that helps the three layers of fabric (quilt top, batting, and backing) move along smoothly when you quilt it together. The lady in the store will know what you're talking about. Get the one she tells you to buy.
To make the quilt, cut the fabric into smallish shapes, and piece them together. I'm not precise about this but you certainly could be. I kind of make it up as go, laying the fabrics next to each other to see what looks best to me.
Once you have a quilt top you're satisfied with (mine are generally about 2 or 3 feet in length and width), cut the batting and fabric you want to use on the back (backing) to size of your quilt plus a few extra inches on each side. The backing can be a fabric you used in the quilt top or something more snuggly like a corduroy or flannel. Next, get out that quilting foot thing, and start sewing them together. You can quilt in a pattern, but that is too fussy for me, so I just tend to sew back and forth within each shape, or sometimes go in a circle. Experiment, and see what looks best to you.

 [the doll bed was a birthday present from the Summers family]
When you're done quilting the layers together, it's time to make the binding. Binding is where it pays to be precise, so don't trust me to tell you how to do it. Get a cheap quilting book from the sewing store, and read the directions. It sounds tricky at first but it isn't so bad, and ends up being one of my favorite parts of the quilt.
Juniper loved this mermaid fabric so much that she begged me to make a doll quilt for her when I finished making one for her friend's birthday. I was happy to do it, because the fabric was a gorgeous orange and blue and the finished quilt is probably the only thing she possesses that isn't pink.

A doll quilt is a small project you can complete in an afternoon or two. It doesn't have to be perfect, and it might even look better with some crooked edges and mismatched seams. And if you have a girl (or a boy) under seven in your life, chances are she is going to love it. Doll quilts were my go-to gift this Christmas, and I think all of the kids were pretty pleased with them. I forgot to take pictures of a few that I made, so if any mothers of recipients out there (Amy, I'm looking at you) want to take a picture and send it to me, I'll post it here.


