The Fiona Sweater

Posted by jdg | Wednesday, November 28, 2012 | 1 comments »

[this is Wood]


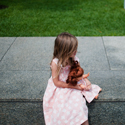
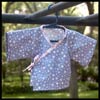
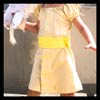
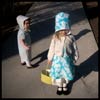
One of the kids' favorite movies is John Sayles's 1994 Irish fairy tale The Secret of Roan Inish. One thing in the movie that really caught my eye now that I'm a knitter was the sweaters that the main character (Fiona Keneally) wears in nearly every scene. They're pretty great, and this one in particular inspired me to knit a light, layering sweater perfect for seasonal transitions (or an Irish summer).


I even had Jim scouring Ravelry for lightweight cardigan patterns that would work.
 

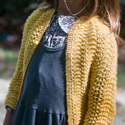
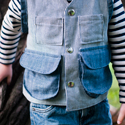
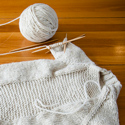
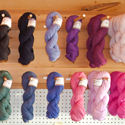
Eventually I settled on modifying this pattern for a child by simply using fingering weight yarn and following the instructions for a larger size. I used Madelintosh sock yarn, which I really love.

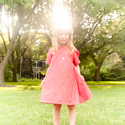
This sweater quickly became one of her favorites and she has worn it nearly every day this fall, and still layers it until her coat well into November. She wears it unbuttoned, just like Fiona.

Chain Mail Sweater

Posted by Wood | Thursday, September 06, 2012 | 0 comments »

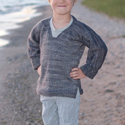
As soon as I saw the pattern for the Easy Pullover for Babies, Toddlers and Kids on the Purl Bee website, I wanted to make it right away. The loose fit, large neck opening, and lightweight yarn were perfect for my son, who like a lot of kids  complains about anything tight or itchy or too warm. The pattern was posted in January, while I was already working on Gram's birthday sweater, and I seriously contemplated ripping the entire thing out and starting the easy pullover. The pattern is perfect for preschool boys, and it is just such a handsome little sweater
 
 
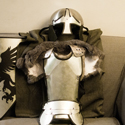
At the time, I forged ahead and finished the birthday sweater, but I never stopped thinking about the pullover pattern. When I came across an absolutely perfect shade of Madeline Tosh sock yarn, I knew that it would make a lovely pullover. The yarn was a slightly variegated gun metal gray -- a perfect combination of beautiful and boyish. I always show all of my new yarn to Jim as soon as I get home from the yarn store, and 99% of the time he shrugs and gives me a completely underwhelming response. HOW CAN HE NOT CARE ABOUT HOW BEAUTIFUL THIS YARN IS? But when I showed him the gray yarn, he actually responded. And as I started to make the sweater, he pointed out that it looked like chain mail. I think he was simply plotting to encourage our son to wear the sweater under one of his many warrior costumes.
 
 
I finished the sweater during the height of summer, so it hasn't gotten much wear until now and I am the one itching for him to wear it. There were a few chilly campfires on the beach up north this summer, and the sweater made its debut then. It might be my favorite project yet.
 
 
(Luckily, I have an extra skein and a half of this yarn leftover. I think I will use it to make a chain-mail head piece for Gram. My costume-making skills have become nearly obsolete by my husband's ever-expanding leather and woodworking skills, but maybe I still have something to contribute to go along with all of the swords and armor.)


Photo
Previous Project: Wooden Swords

Adventures in (Wooden) Swordmaking

Posted by jdg | Tuesday, May 15, 2012 | 2 comments »


This is Jim again. I know last time I said if my wife ("Wood") didn't post here I was changing the name of this part of the blog from Woodcraft to Jimcraft, but (not only does that sound incredibly stupid) this week I'm writing about actual woodcraft, so the name is sticking. For now.

A few weeks ago I was in my dad's auto body shop looking at some of the woodworking he's been doing. He and my mom have been working on some wooden art projects in their retirement that I will write more about soon, but on this day I asked if we could make some quick swords for the kids to go with their leather knight/elf costumes. The swords I'd bought from an etsy seller were the one part of the costumes they were really disappointed with; the etsy seller used "furniture-grade white pine" and the swords were very beautiful but horrible for play. The wood was so soft that the slightest strike created a huge dent and the kids always felt like their swords were going to break. Personally, I think kids who want to play with wooden swords should actually be able to play with them.

I've never done any woodworking before, so my dad taught me how to use all of his incredible equipment. He showed me how to use his huge bandsaws and belt sanders and even his smaller hand tools, including files and rasps. In about an hour we made two small swords: an elf dagger for my daughter and a Roman gladius for my son. Both were made from scrap mahogany.


When I got back home I used that cheap woodburner to draw some pictures on the swords, and then I finished them (the dagger is finished in the picture above). I really enjoyed working with the wood, and I wanted to get some of my own equipment right away. Even though I could tell I was about to go overboard all over again, I found a $40 Delta scroll saw on craigslist and bought some Japanese rasps and files and started buying junk hardwoods at the architectural salvage warehouse in town. Then I just started making swords.


The first one was terrible. I used a big piece of red oak that was difficult to cut and I accidentally made it way too skinny right above the hilt. Still, I managed to cut the hilt in the shape of a dragon with spread wings and didn't cut off any of my own fingers. So I set to work smoothing the edges with rasps and sandpaper, which is a super inefficient way to do it (a belt sander is way easier) but this way I was able to work on the sword outdoors while the kids played at the playground.


In fact, other than the initial cutting, I was able to do all the work on these swords outdoors while my kids played at the playground. I asked the kids to draw me the kinds of swords they wanted and I tried to make swords that matched their expectations. I made a few basic swords out of a piece of walnut and got the hang of the equipment and process. After the third sword I was pretty addicted.

Then I found a nice piece of salvaged maple from the warehouse and made two swords from it. The top one is how it looked right after the saw, and the bottom has just started getting shaped with a rough rasp.


I experimented with various ways to get hilts on the swords. This is where having a scroll saw really seemed better than the bandsaw, because I was able to drill a hole in the hilt, cut it bigger with the saw and slide it up over the handle before gluing and clamping it in place. Here's what those maple swords looked like when I got them sanded, burned some ivy and rose designs on them, and added jewels to the end of the handle (very important to the designers). I also threw together some quick leather scabbards with a tree of life design I made up myself:


I think that's his favorite sword I've made so far. We can have swordfights with lots of blade clashing and they hardly get dinged at all. So much better than pine. After the first few swords, I decided not to finish the wood with anything other than boiled linseed oil. The wood I was using was so beautiful on its own, I didn't want to mess with it.


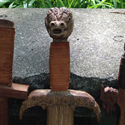
My favorite sword is the one the kids designed and called "Dragon's Claw," with the head of a dragon for a pommel and sharp dragon claws on the hilt. My dad gave me some beautiful scraps of exotic wood and I made this from what I think is zebrawood. The grain is so cool and it was so much fun learning how to carve it.


Here's a bit more of a closeup of the dragon's head and the claw hilt:


I used leather lace for the handles of all the swords. I made a scabbard to go with Dragon's Claw with a hydra design carved in it, but I don't really like how they look together, so I might make another scabbard for it.


None of the other swords fit the hydra scabbard, so that probably means I have to make another sword. Oops!

After that, I guess I'd better get to work on some shields. I freaking love my job.

Leather Armor in Progress

Posted by jdg | Thursday, April 12, 2012 | | 0 comments »

[This is Jim again, two weeks in a row. Another one and I am taking up knitting and changing the name of this site to Jimcraft]

So I thought I'd just share some pictures of the leather armor I made for the kids in progress. I'm terrible about following how-to's or tutorials so I'm afraid I'm not very good at writing them. For my son's armor I bought a scrap remnant of 9 oz vegetable-tanned leather for about $15.00. I cut a piece of cardboard into the shape of a breastplate and fit it on my son, then used that as the pattern to cut the leather. I carved the dragon into the leather (after using a sponge to wet the leather a bit) and then soaked it in the tub (using hot but not boiling water). After it was well soaked I took it out, put it back on the cardboard form and cooked it for a while at 150 degrees. When it was done, it was rock hard and ready to be dyed. I used a "forest green" dye for the dragon and the stamped edge:


The brown color is what the veg-tanned leather looks like in its natural state. Then I used several applications of black dye on that part:


While the front piece was drying, I cut a back piece out of a thinner (3-4 oz) veg-tanned black leather. I soaked, shaped, and cooked it to fit the boy's back, then attached the two pieces with old belts.


* * * * *

For most of my daughter's wood elf armor, I used an already-dyed remnant of 3-4 oz. veg-tanned leather. It cost about $6. From the biggest piece of the leather I cut the breastplate and molded it into shape just like I did with the back of her brother's armor. While it was hardening, I cut out dozens of little leaves from the remainder of the leather, as well as two oak leaves (all from the same leather). With some of the scraps from the heavier 9 oz leather we made six green maple laves. Four of them would become the shoulder pads, and two would go down with the oak leaf faulds.


While the kids were playing at the playground, I carved vein patterns into the leaves. The leather was too thin to do much beveling or stamping, so this went rather quickly.My daughter even took over and carved many of the smaller leaves herself.


After the leaves were carved, I laid them over cardboard tubes and cooked them until they had a bit of shape. Then I applied a layer of molten beeswax to harden them. I attached each leaf to the breastplate using single rivets, then added an old belt for waist and shoulder straps.


Birthday Sweater II

Posted by jdg | Wednesday, March 28, 2012 | | 0 comments »


[Note: this is Jim writing this, not Wood. Sorry!] 

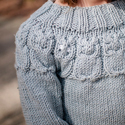
So my wife is too busy working hard to write about this beautiful sweater she made but I couldn't let the weeks go by without sharing it. We made the kids all their birthday presents this year, and our daughter was pretty excited to find this sweater finished and sitting next to her bed on the morning of her birthday (she may have seen some of it in progress). Those are little owls.


If you look closely, you can see that one of the owls on the front (and one on the back) is awake, with little button eyes:


The pattern is "Owlet" by Kate Davies, available on Ravelry here. My wife said some knitters have adapted the pattern to make this sweater with Totoros instead of owls. That is pretty awesome, but I can't figure out how to navigate Ravelry to find it. Ravelry is even more confusing than Pinterest to my male brain. Anyway, the yarn she used was "Sublime Cashmere Marino Silk (Aran weight)," also on Ravelry here.


Birthday Sweater I

Posted by Wood | Tuesday, March 06, 2012 | | 0 comments »


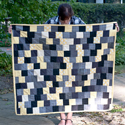
For the kids' birthdays this year Jim and I decided to make their presents (we knew the collective grandparents and their friends would take care of the store-bought stuff). Each kid got a new quilt, a sweater, and a costume from their dad. I can't speak for Jim---but making the quilts and sweaters for the kids' birthdays was as much for me as it was for them. I liked the symmetry of making them the same things, and all were projects that I had been trying to move to the top of my list for a while. I hope this will be the first post of several in the next few days sharing these projects (I haven't been very good about updating this site).

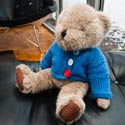
I used Hadley Fierlinger's pattern from Vintage Knits for Modern Babies for Gram's sweater (a book I highly recommend). This was based on a vintage pattern, so the pieces were made separately and then sewn together. I have to admit I was very skeptical and considered unraveling the whole thing more than once. Even as I sewed together the finished pieces, I still thought it was going to be a huge failure. It seemed way too small and I just wasn't sure I was lining up the raglan seams properly. So I was kind of shocked when it was all done and it was so charming and perfect. A bit on the small side -- that is my fault, not Hadley's -- but it fits him and he actually likes it. He wore it to school twice during the first week. A big improvement over my first attempt to make him a sweater. 


He likes it because the yarn is so soft. I used yarn that I bought at the Michigan Fiber Festival last summer. It is Knitting Notions classic merino superwash sport. I bought the yarn at the festival directly from Catherine Harrison, the owner of Knitting Notions. The yarn is expensive (the most I've ever spent on a single skein), but it is beautiful and soft and gorgeously dyed.


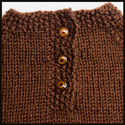
(I really like the buttons on the back). I'll soon share the birthday sweater I made our daughter.