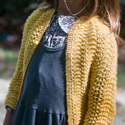
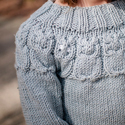
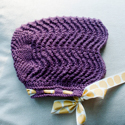
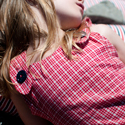
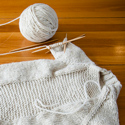
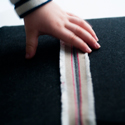
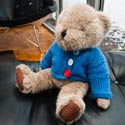
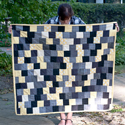
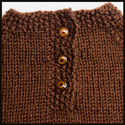
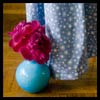
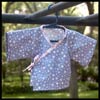
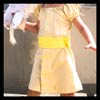
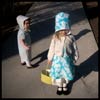
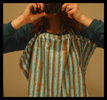
Just look at this knit dress my wife made for our friend who had her first baby girl this past summer. I do think the only time I've ever seen my wife sad is when she can't think of any pregnant ladies who she can knit for.
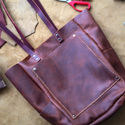
A lot of the projects I share on the blog are for the kids and their imaginative play, but I've been enjoying branching out and making some other kinds of things lately. I very rarely make anything for myself, and one day I realized I needed a toolbag/tool roll for bringing all my tools and odds and ends out to the playground, where I do most of my work. I was keeping my tools out in tote bags or even paper grocery bags, and I was spending more time digging through them looking for specific tools than I was spending on the actual work.
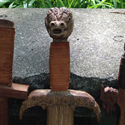
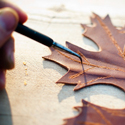
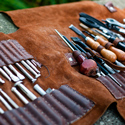
The last thing I wanted to do was buy something sewn in some factory across an ocean, and I couldn't really find anything exactly like what I wanted anyway. I did find some examples of toll rolls other guys made themselves, and adapted some of the ideas I saw for my own needs. There's something really cool about designing something for yourself, suiting it to your exact needs, and building it with your own hands. In this case, I needed something that would roll out across the stone bench where I do most of my work, keeping all my tools in place but allowing easy access as I needed them. Here's what I came up with, and should also give you a sense of the tools I use most often while working on most of the things you see on the blog:
The middle compartment has a strip with a heavy lace running through it to create loops for my bigger tools, and can be loosened and tightened as necessary by pulling the end of the lace. That's where I keep my carving and molding tools, awls, bevelers, knives, and punches. On the left compartment, I sewed pockets for each of my most commonly-used stamping tools and needles:
That folds over the center, then the flaps cover both and attach together with a simple button stud closure. The right compartment has a simple envelope pocket where I can keep thread, rivets, and any other small items I need for a specific job.
On the opposite side from the big interior pocket, I stuck a couple irregular elongated pockets to hold mallets and other longer items, and fitted the belt closure to run between them:
Then I attached a short strap for easy carrying. That round buckle is one-of-a-kind: hand-forged in Italy and found in an antique shop there last summer. I also used the last of my beloved Kodiak oil-tanned cowhide that has been a part of some of my favorite projects and gifts (including my daughter's Amelia Earhart-style flight helmet that I made a few months ago):
She wore that thing well into the sweaty days of summer!
 |
| Mittens, ready to be felted |
I've also been making wallets and little clutches. My wife sent me a picture of a $100+ clutch she liked online so I just made her one pretty close to it with like $5 worth of leather. As Ron Swanson said a couple weeks ago, "People who buy things are suckers."
I have made three wallets for myself now. Who needs three wallets? Especially somebody who likes to pretend he never buys anything?
Handmade Christmas Projects: The Wooden Pony and Castle
Posted by jdg | Friday, January 11, 2013 | 0 comments »Handmade Present #1: Bud, the Wooden Pony
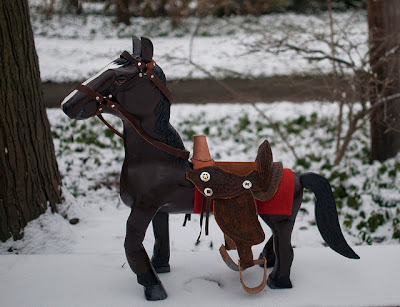
The second wooden horse I made for my daughter was, I think, partly the result of her dissatisfaction with the first. When I asked her what she wanted for Christmas this year, she said without hesitation she wanted a horse the size of "Oatmeal" that she could sit on, but one that felt more like a real horse.
"You mean, like round instead of skinny and sharp? Like a Schleich horse big enough to sit on?"
"Yes, exactly."
"You got it."
I was happy to take that old horse apart so there'd be more room in the house. And I was excited to work on a similar project that would allow me to use some of the skills I've learned since to make it even better. I've been doing a little bit of basswood carving on the side so I decided to make the whole Christmas horse out of basswood, which my dad told me was the preferred wood of decoy carvers. I knew I'd be painting over the grain and everyone says basswood is among the best carving woods, so I found a thick 10-foot piece that was pretty cheap. I knew I'd have to glue numerous pieces together to get it to the shape of a horse but I underestimated how hard it would be to cut it all out on my little scroll saw and how heavy the thing would be. I started by making and carving the head and neck, which I first drew out on paper to transfer to wood for cutting:
Once the pieces were glued together for the proper thickness, I started to carve out the details. The head and neck were done entirely with a carving knife, a couple of gouges, rasps, and sandpaper. The eyes are from a taxidermy supply website.
I really struggled with getting the body into the right shape. That was definitely the hardest part of this project. I needed to use a lot of wood, but I quickly figured out that in order to make a body proportional to the head I'd already carved the whole thing would be prohibitively tall and heavy. So the body is a little smaller and skinnier than it should be, and the legs a little shorter than they should be in order to be the right height for her to sit on it comfortably. My dad really helped me shape the body with some of the amazing tools in his shop and when the horse was finally standing on four legs I bemoaned how disproportionate it was. He cheered me up by saying that give it a nice folk art quality. "Folk" is, I think, the art world's nice way of saying charmingly amateurish. I imagined a hundred years into the future and somebody buying this pony at my grandson's garage sale to try to sell to fancy New York-types as the product of a deranged turn-of-the-21st-century unemployed Detroit hillbilly. That made me feel better.
After using my dad's tools for a day, going back to my knives and rasps was like going back to Kansas after seeing the lights of New York City. Still, I managed to carve out the mane and the tail in my basement and then sand out most of the imperfections in the body. With the horse mostly carved I set to work on the leather saddle. I looked at pictures of western saddles online and got to know all the various parts. I made a scaled-down pattern and started cutting and stamping designs into the pieces. Around this time I got a complaint from my co-op board that someone was hearing hammering sounds coming from my basement. I wanted to respond: "Dear Grinches, I'm hand-tooling a leather saddle for the static wooden toy pony I just carved my daughter for Christmas." Then I realized how much that made me sound like a deranged unemployed Detroit hillbilly. Someone asked me what they thought my former co-workers at the big law firm would think if they found out I'd spent hours in my basement hand-tooling a leather saddle for the static wooden toy pony I carved my daughter for Christmas and I said they should be worried about what I think about them spending 80 hours a week going through boxes of discovery in protracted litigation over some stupid airline lease. Other than a few moments of frustration, I loved every moment of working on this gift for my daughter.
I added some conchos to the saddle and real metal on the stirrups. The pommel has her initials carved into the top and there's a secret message to her carved in the underside of the saddle I hope she finds one day. After the saddle was done I made a bridle out of the best leather I had. When that was done I painted him, which involved a lot more sanding and calls to my father for advice. I used a pre-sanding sealer, acrylic paint, and a polyurethane finish. I chose to make the pony a dark bay like the horse she used to ride in her summer riding lessons.
My son still loves knights and medieval stuff as much as he did last year, but because he had nowhere for all his little plastic Schleich and Papo knights to storm and defend he asked for a wooden castle. I was slogging through the hardest part of working on the pony when he told me that's what he wanted, and I almost just went out and bought him one rather than get involved in another wood project. But a few days later I found a really nice long piece of ribbon mahogany for $26 and decided to stop working on the horse for a few days and build him a simple castle out of that really nice wood.
The gatehouse, drawbridge, walls, and walkways are all made from mahogany. The corner towers and the ramparts of the gatehouse are ash. The flags are 2 oz veg-tanned leather that I baked into a waving shape and dyed red. The hanging tower flags are carved with the same griffin who is carved on the front of the drawbridge, which is attached to chains that go through little pulleys so it can easily be pulled up when enemies to storm the gate.
Inside the gate house there is a portcullis made from purpleheart that also goes up and down.
There's another set of doors that close over the front gate inside the castle. I found a bunch of beautiful antique-looking hinges and I figured the doorway is the most fun part of any castle so I wanted it to be really cool. He just pulls those rings above the doorway inside the castle to bring up the drawbridge, and he can loop them on some pegs in the tower to keep the bridge up:
I added a few other things, like ladders for invaders to climb and a small dungeon room inside the castle. The dungeon has two doors, both made of walnut with walnut dowel bars and antique hinges. He can padlock the prisoners in when he drops them through the trap door to brood over their misdeeds. I didn't take any pictures, but the inside walls of the dungeon are lined with chains and shackles to lock up any particularly unruly prisoners.
The only screws or nails in the whole castle are on the hinges attaching doorways to the wood. Everything else is just dowel joints, and it was super easy. The only advantage to using a scroll saw for all the cutting on this project were the many windows (which can be cut out on a scroll saw by removing the saw blade and reattaching it through a hole drilled in the wood). Also, I think the turning radius for the crenelations was way better than if I'd used a bandsaw. Otherwise, cutting the longer straight lines required a lot of patience, and a lot of cursing. I didn't have time to completely sand and finish all the surfaces before Christmas. Right now it's completely natural, though I do want to put some kind of protective finish on it. I'll probably sneak it away for a few days once he's lost interest in it. But I don't think that's going to happen any time soon.




.jpg)

